

How to Build a Modern 3-Seater Garden Bench (UK DIY Guide)
Meta Title: Build a Modern Garden Bench (Step-by-Step UK DIY Guide)
Meta Description: Learn how to build a strong, modern 3-seater garden bench using C24 timber, simple tools, and beginner-friendly joinery techniques.
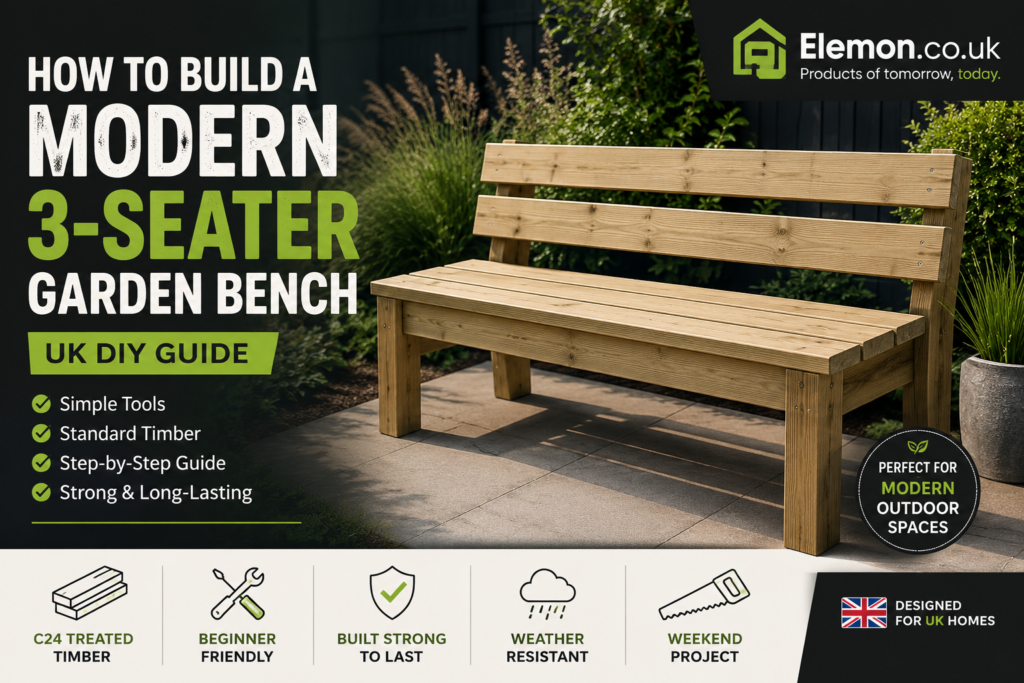
A well-built garden bench can completely transform your outdoor space, adding both function and a clean modern aesthetic. This DIY project uses standard UK C24 pressure-treated softwood, simple straight cuts, and structural screws—no advanced carpentry required.
🧰 Materials & Tools Checklist
🪵 Timber (C24 Treated Softwood)
- Seat & Back Slats: 5 × 47mm × 100mm × 1500mm
- Frame & Legs: 3 × 47mm × 100mm × 2400mm (cut to size)
🔩 Hardware
- 70–80mm exterior structural wood screws (Spax / TurboGold)
- Waterproof exterior wood glue (D4 or polyurethane)
- Optional: exterior wood oil or stain
🛠 Tools
- Cordless drill/driver
- Mitre saw or hand saw
- 3mm drill bit (pilot holes)
- Spirit level
- Speed square
- Sandpaper (120 grit)
✂️ Cut List
| Component | Quantity | Size | Purpose |
|---|---|---|---|
| Seat Slats | 3 | 1500mm | Seating surface |
| Back Slats | 2 | 1500mm | Backrest support |
| Front Legs | 2 | 450mm | Seat height support |
| Back Legs | 2 | 850mm | Backrest structure |
| Cross Braces | 3 | 400mm | Frame stability |
🪚 Step-by-Step Build Guide
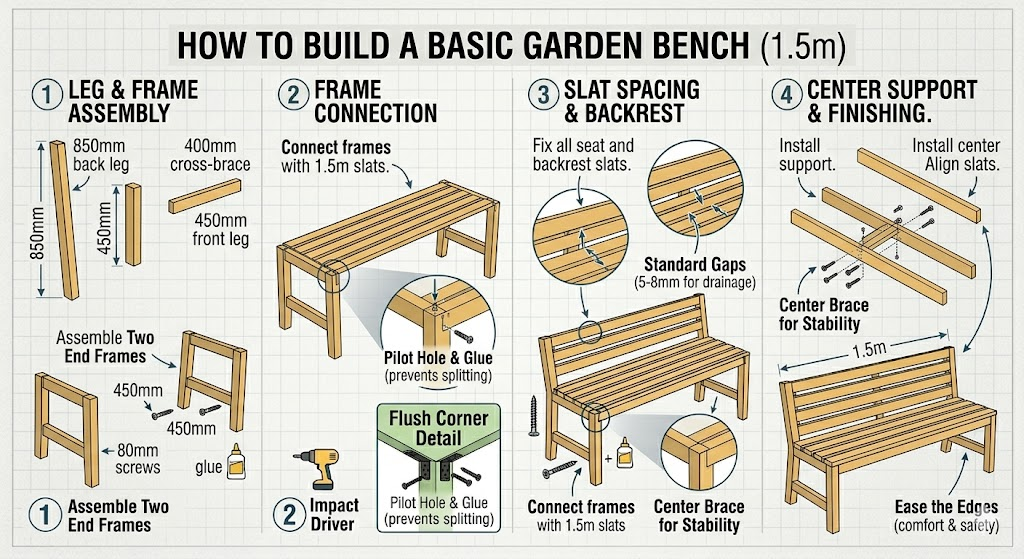
1. Prepare & Sand Timber
Sand all edges using 120-grit paper. Slightly round corners to improve comfort and reduce splinters.
2. Build the End Frames
Attach each 450mm front leg to an 850mm back leg using a 400mm cross-brace.
- Apply exterior wood glue
- Pre-drill all holes
- Secure using 80mm structural screws
- Repeat for both sides
3. Install Seat Slats
Position the two end frames upright.
- Place 3 × seat slats evenly across the frame
- Leave 5–8mm gaps for drainage
- Fix with two screws per connection
- Countersink screw heads for a clean finish
4. Fix the Backrest
Attach the two back slats to the upper section of the back legs.
- Top slat flush with top edge
- Maintain even spacing
- Glue + screw for strength
5. Add Central Support (Recommended)
Flip the bench and attach an extra cross-brace under the centre seat slat to prevent long-term sagging.
🌧 Pro Tips for a Long-Lasting Bench
Protect the base:
The bottom of legs absorb moisture from the ground. Add rubber feet or plastic spacers to extend lifespan.
Always pre-drill:
C24 timber can split under pressure—pilot holes are essential.
Finish smart:
For a modern aesthetic, use:
- Charcoal exterior stain (contemporary look)
- Or clear decking oil (natural grain finish)
🏡 Final Result
You’ll end up with a strong, minimalist 3-seater garden bench that fits modern UK outdoor spaces perfectly—ideal for patios, gardens, or pergola setups.
🌐 About Elemon
This guide is part of Elemon.co.uk – “Products of tomorrow, today.”
We focus on modern DIY builds, smart home ideas, and practical engineering-style home projects.ull article content will be added later.
Additional information
👨🔧 My Experience
I’ve built several outdoor timber projects over the years, and one lesson I’ve learned is that simplicity often produces the best results. This garden bench design is a great example. Using standard C24 treated timber keeps costs reasonable while still delivering excellent strength and durability.
What I particularly like about this build is that it doesn’t require advanced woodworking skills or expensive workshop equipment. With careful measuring, proper pilot holes, and quality exterior screws, you can achieve a professional-looking result that will serve your garden for years.
I also highly recommend spending extra time on sanding and applying a quality exterior finish. These small details make a noticeable difference in both comfort and longevity.
✅ Key Takeaways
- Uses readily available UK C24 treated timber.
- Beginner-friendly project requiring only basic tools.
- Strong and durable design suitable for outdoor use.
- Drainage gaps between slats help prevent water damage.
- Centre support brace improves long-term strength.
- Exterior wood protection significantly extends lifespan.
- Ideal weekend DIY project for homeowners and garden enthusiasts.
📚 Related Articles
If you enjoyed this project, you may also find these guides useful:
- DIY Outdoor Storage Bench Ideas
- How to Build a Wooden Planter Box
- Best Exterior Wood Treatments for UK Weather
- DIY Pergola Build Guide
- Outdoor Solar Lighting Installation Guide
- Smart Garden Upgrade Ideas for Modern Homes
Explore more practical DIY projects and home improvement guides at Elemon.co.uk.
⚠️ Disclaimer
The information provided in this article is intended for general educational and informational purposes only. While every effort has been made to ensure accuracy, Elemon.co.uk accepts no responsibility for injury, loss, damage, or errors resulting from the use of this guide.
Always assess your own skill level before undertaking DIY projects and seek professional advice where appropriate.
🇬🇧 UK Regulations & Safety Information
Before beginning any DIY project:
- Follow all manufacturer instructions for tools and materials.
- Wear appropriate Personal Protective Equipment (PPE), including safety glasses, gloves, and hearing protection when necessary.
- Ensure power tools comply with UK safety standards.
- Work in a well-ventilated area when applying wood treatments, stains, or finishes.
- Dispose of timber waste, sawdust, and chemical products responsibly in accordance with local council regulations.
- Check for underground services before undertaking any garden excavation or ground fixing work.
- If the bench is installed in a public or shared space, additional safety and accessibility requirements may apply.
For the latest guidance, consult official UK health and safety resources and local authority regulations.
🖼️ Image Notice
All images are for reference purposes only. Actual materials, colours, dimensions, finishes, and construction methods may vary depending on available products, tools, and individual project requirements.